

How To Connect Round Register Vent
1 / 12

Working with round ductwork
Whether yous're calculation new heat runs in a basement or irresolute the layout of an existing HVAC system, y'all'll probably exist working with round metallic ductwork pipe. Nosotros invited Bob Schmahl to requite u.s. a few pointers. Bob's been a tin bough for more than than 40 years. He insists he still doesn't know everything about ductwork, but we weren't convinced. These tips should help make your next chore run that much smoother.
ii / 12
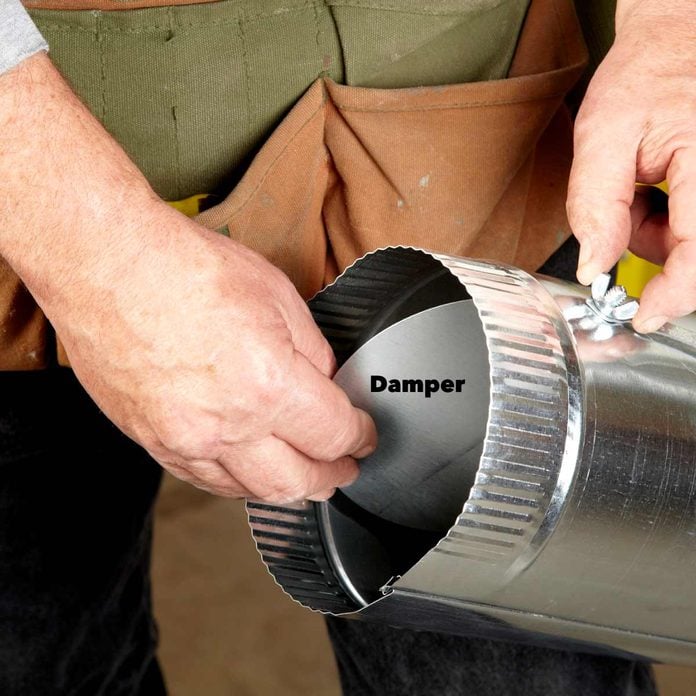
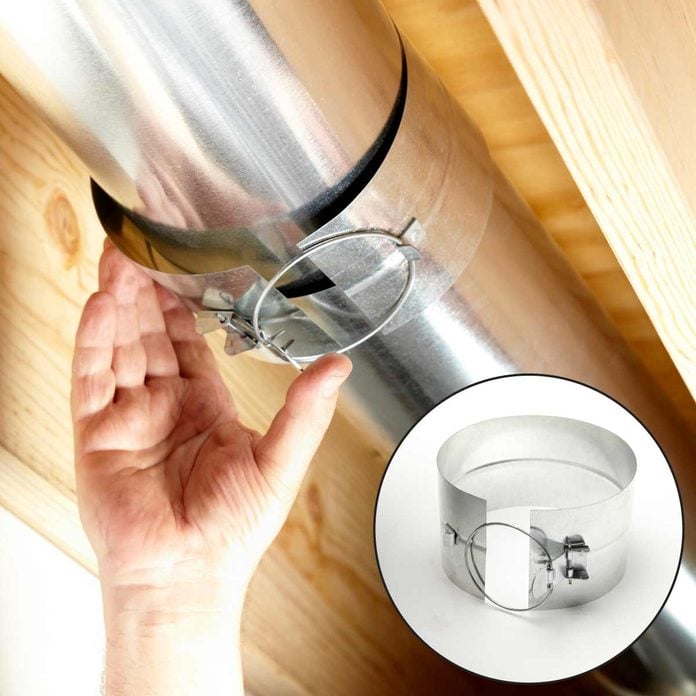
Install dampers at the registers to adjust airflow
Adding heat runs in a basement may alter the airflow in the ductwork going to other rooms. Each register should have its ain damper that can be accessed for adjustment. If those dampers can't be accessed from below, you'll desire to install them shut enough to the annals so that you can achieve them through the register opening. Bob likes 4 x 10-in. boots (not shown)—you can easily fit your hand in them to adapt dampers, and there are more than grate cover options for that size.
iii / 12
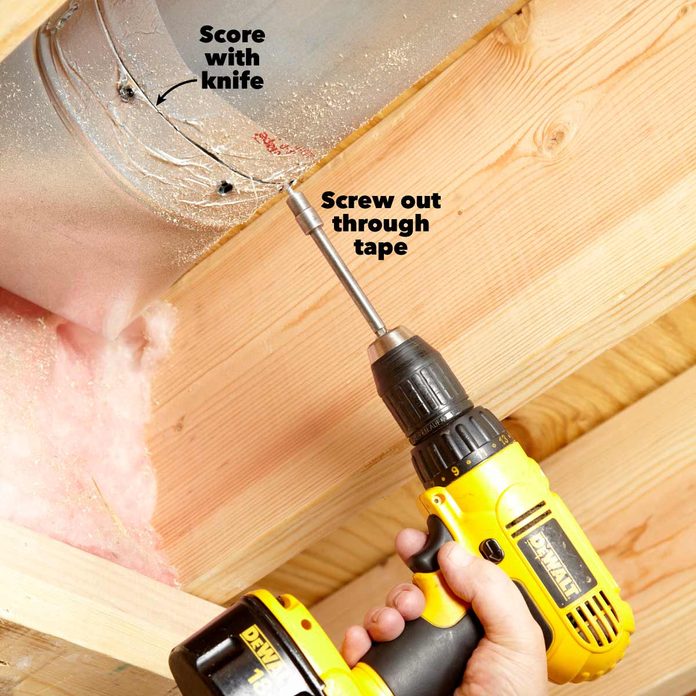
Don't pare off old tape of metal ducting
If you have to detach existing ductwork fittings, there's no need to peel off the old foil record beginning. Instead, but score the tape at the seam with a utility pocketknife and remove the screws right through the tape. When it comes time to retape, simply make clean off the dust and employ new record right over the former.
four / 12
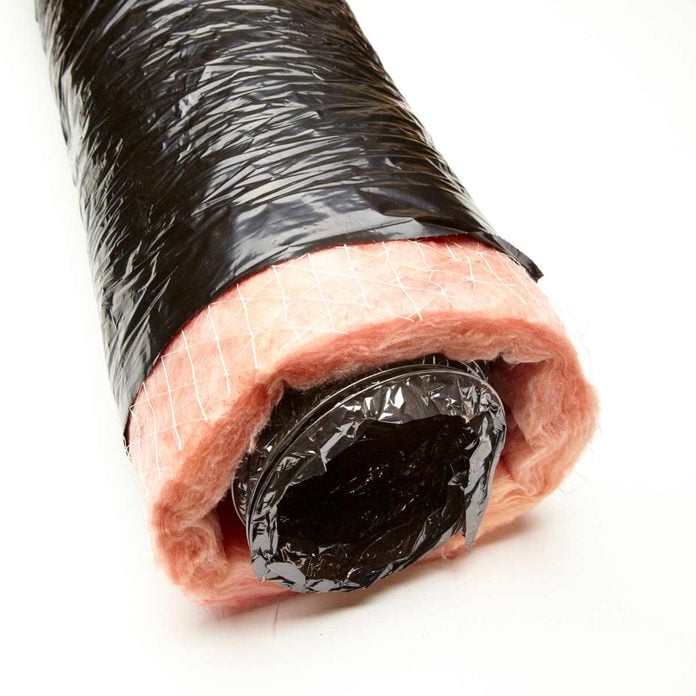
Bob's not a fan of flexible heating ductwork
At that place's no question that flexible duct is easier to install than metallic ductwork, only consider this: Flexible duct can degrade over time. It collects dust and is about impossible to clean. Flexible duct needs to be larger than pipes to allow the aforementioned amount of airflow. The virtually mutual problem Bob has seen: "People get careless and turn corners likewise sharp, which creates kinks that severely restrict airflow."
5 / 12
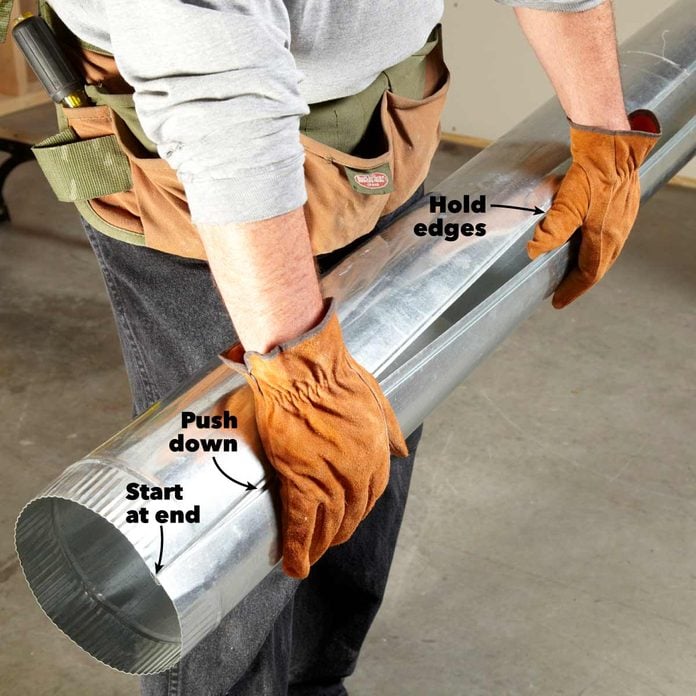
Assemble the metal ducting like a attachment
When assembling pipe, commencement at one cease and work the seam together similar a zipper. Employ 1 mitt to keep the ii edges close and the other to apply downward pressure level. Use your leg, a workbench or the footing to back up the back side of the pipe. If you brand a error and have to dismantle a pipe, slam it down flat on the ground, seam side upwards. Information technology should popular right apart.
6 / 12
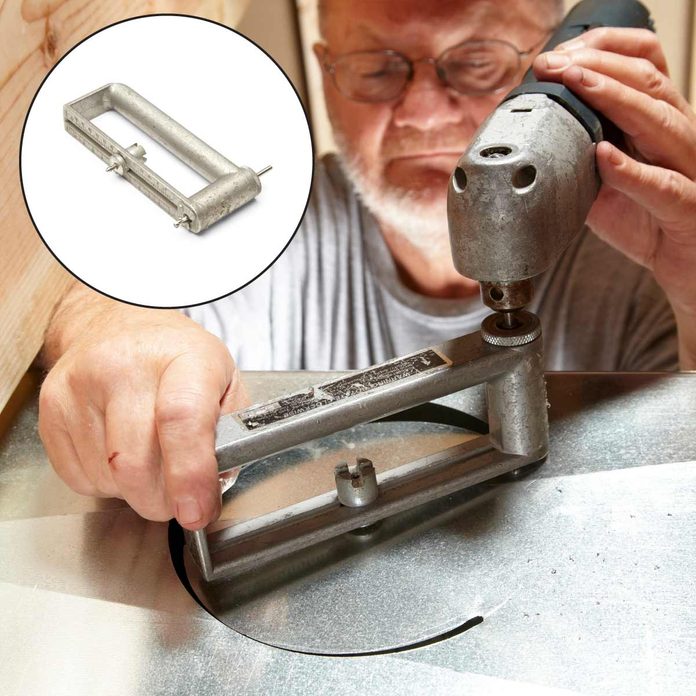
A hole cutter works smashing in tight spots when replacing ductwork
Aviator snips work fine to cutting holes in a trunk line, but only if there's plenty space. If you're dealing with close quarters and you own a right-angle drill or attachment, you may want to invest in a sheet metallic hole cutter. Otherwise you might take to take down the trunk line.
7 / 12
Overlap barrel joints with describe band connectors
When you're installing a pipe between 2 fixed parts, it's impossible to slip in the piece using the crimped ends and still get the required 1-ane/2-in. overlaps at both ends. Overlap 1 side every bit you usually would and create a barrel articulation on the other. Employ a draw ring connector to complete the butt joint.
If your supplier doesn't behave draw band connectors, make your own by cutting a piece of pipe to overlap the ends, so screw and record the band into place. If you lot're working with 6-in. piping, you'll need to use vii-in. pipe for the bands.
viii / 12
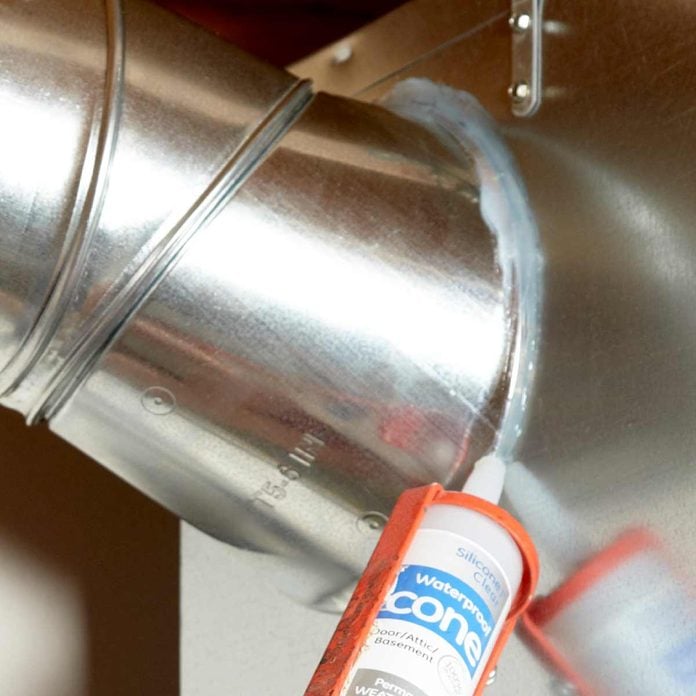
Caulk the take-offs
Caulk (don't tape) the connexion between the body line and a take-off (elbow) before you lot connect pipes to it. That mode, y'all'll be able to turn the have-off out of the way to caulk above information technology. Regular silicone is fine.
9 / 12

Leave backing on the record on metal ductwork
If the ducts are going to exist concealed, all seams need to be taped or caulked. Here'southward Bob's trick for taping a seam on a pipe that's installed close to the subfloor: Cut a piece of foil tape to length. Peel off part of the backing. Slide the backing up and over the pipe. Finally, pull downwardly on the backing, which will pull the record along with it. Inspectors volition want to know you've used an approved tape, so purchase the stuff with writing on it, or keep the roll on-site until inspection.
10 / 12
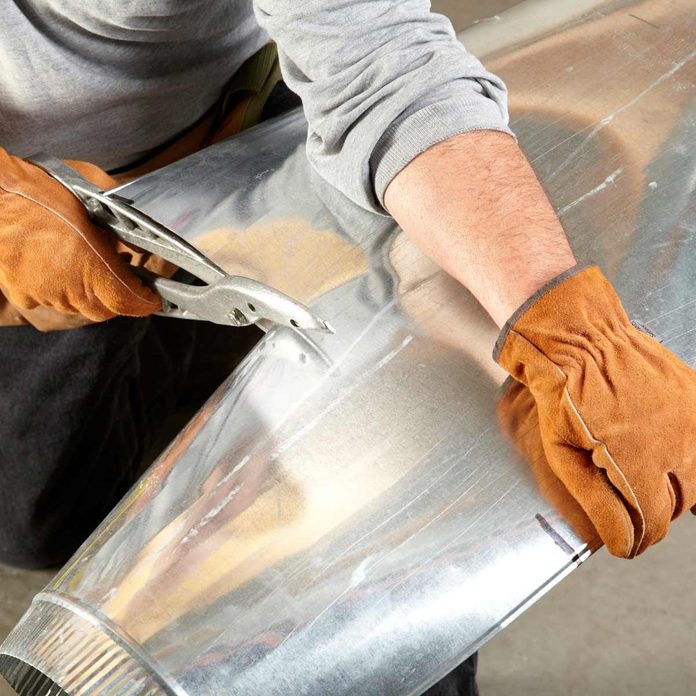
Make two marks for cut when replacing ductwork
When cut pipage, Bob likes to mark the size he needs on each side of the open seam with a marker. Flat metal is easier to cut than curved, and then he uses his knee joint to support and flatten the pipe while he opens information technology up. Then you merely sight on the far mark while y'all brand the cut. It'll be direct and perfect every time. Bob prefers snips made by Malco, which toll less than $35 online. Unless you enjoy trips to the ER, wear gloves when cutting pipe—the stuff is razor sharp.
11 / 12
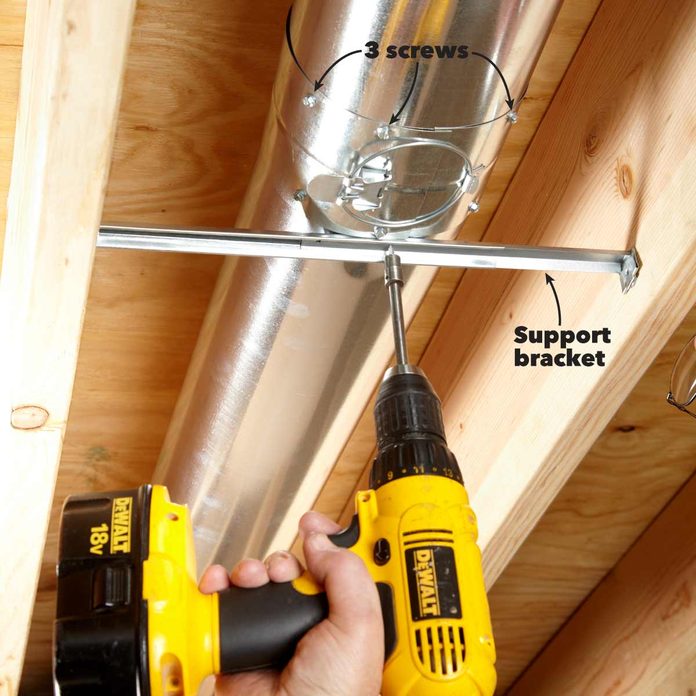
Use support brackets and three screws to reduce motion and noise
Each pipage needs support. You tin can use just about any back up yous want, but adaptable steel support brackets are quick and easy. And don't forget to screw the pipe to the joist hanger so the pipes won't rattle when someone stomps across the floor in a higher place. Every connection needs three screws. They don't have to be evenly spaced. Apply 1-in. galvanized zip screws designed for sheet metal.
12 / 12

Move i ring at a time to construct curves
Figuring out the right combination of turns to get an elbow to point in the right direction can exist perplexing. Bob recommends moving i "gore" (elbow ring) at a time, starting with the connected side. And don't make 90-degree turns if you don't accept to. A ninety-degree elbow creates the aforementioned resistance as calculation 5 ft. of pipe.
Originally Published: September 30, 2019

How To Connect Round Register Vent,
Source: https://www.familyhandyman.com/list/round-ductwork-installation-tips/
Posted by: swansonfulta1954.blogspot.com
0 Response to "How To Connect Round Register Vent"
Post a Comment